Installation Guide for the 17 x 17 Tethered DR Panel, Dell Computer, and Monitor
This article will cover how to install a 17 x 17 DR panel into a Chiropractic X-ray room.
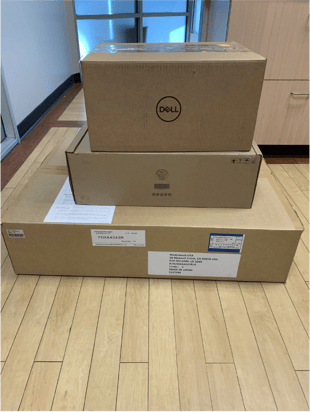
The Delivery
Here are the 3 Boxes that you will receive. You will get in the PC box. 1 power strip 1 short Cat 5 cable to connect to your local network 1 50' Cat 5 cable to run to the control box. Unbox the three boxes to get started.
DR Panel Install Guide
- Step 1 - Install the PC and monitor. There are two NIC cards on the PC. One is used to connect to the internet and the other will connect to the DR panel. The one closes to the power plug is the one that you will want to use for the interenet. If you do not have a hardwired internet option, then you will need to purchase a wireless network adapter. Here is a good option: Click here to buy on amazon.com
The touch Screen monitor has two cables that have to be plugged in for the touch screen to work.
Here is a picture to help display where the cables should go.
1 - Display Cable- It has 3 slots on PC and also the Monitor it does not matter which of the two.
2-- The Cable looks like a printer cable with a USB connector. There is only one slot for this cable. Plug the non USB side into the slot that has blue inside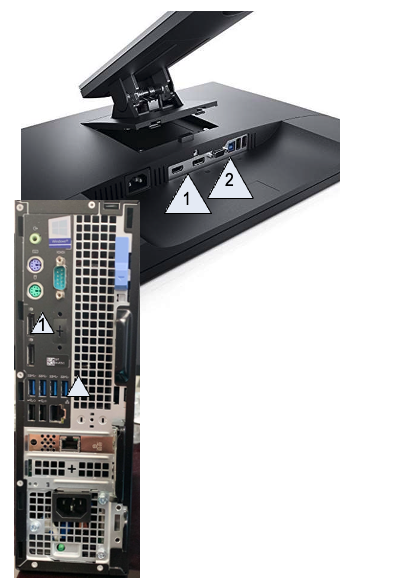
- Step 2 - Turn on the PC and Monitor. Once the PC has been turned on it will go to a log-in screen. The default user/pass is the following:
User: xray
Password: admin
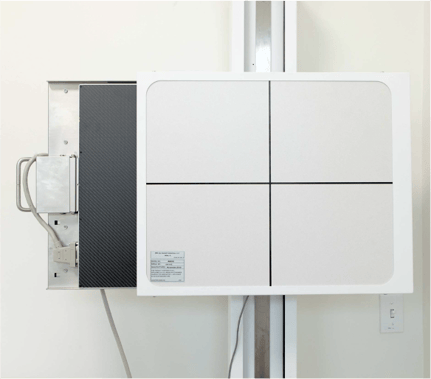
You can change this password after log-in in to the windows control panel. - Step 3 - Install the DR panel. Take the DR panel and place it into the x-ray wallstand. The 17 x 17 Tethered DR Panel fits seamlessly inside your current wall unit tray. Just pull the tray out, unlock the lock and slide the 17 x 17 tethered DR panel in with the 24 Pin on the outside Left side tray the Connector will be at the bottom Right side tray the Connector at the top. There is a setting within the software setup that will allow for either positioning
Once the PR panel is in the wall stand, connect the tether to the 24 pin connector and tighten with the provided Allen wrench.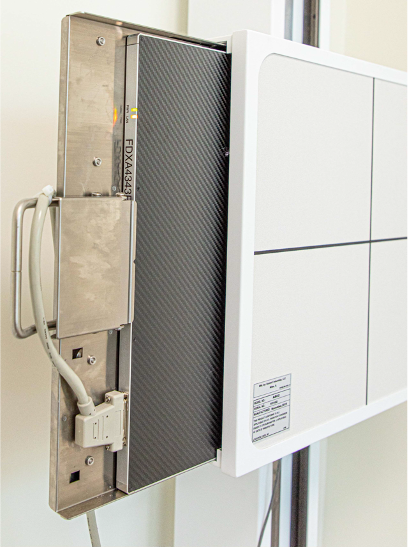
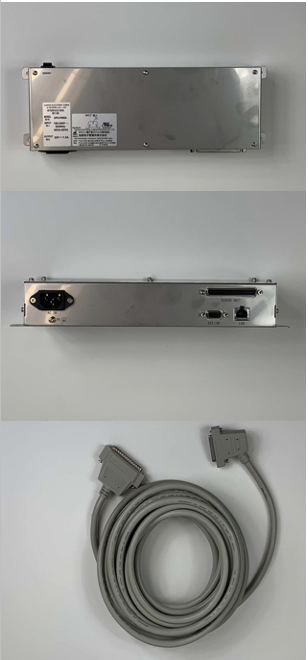
Now you just have to connect the other tether to the SCU box, which is the sliver power box. Connect the SCU box to power. The last step for the DR panel is the connect the CAT5 internet cable to the SCU box and then connect the other end to the PC. Once connected, turn the black toggle switch on to power the DR panel.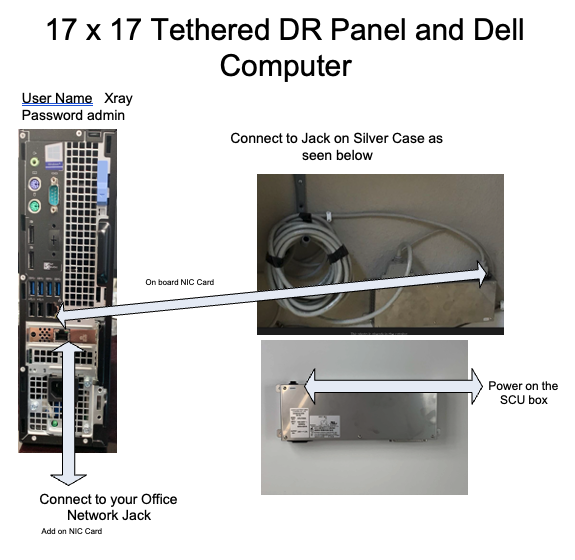
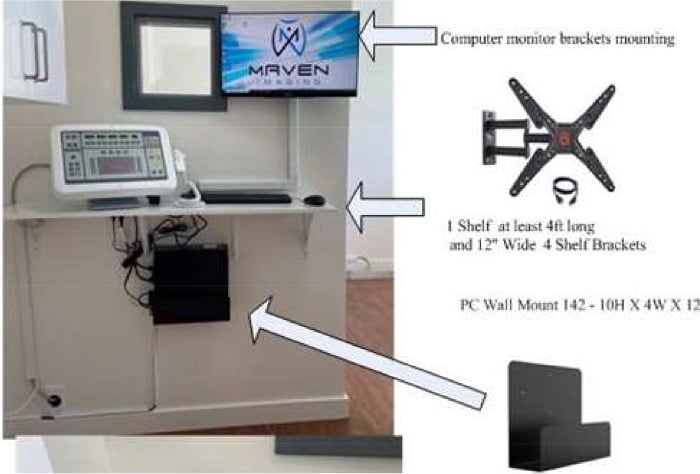
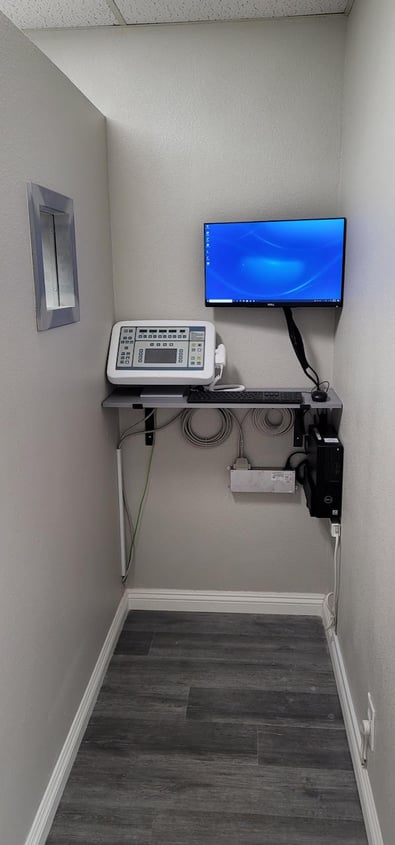
- Step 4 - Optional Control Panel accessories. Depending on your layout, you might want to add a shelf, monitor mount, or PC mount. Here are a few pictures of completed installs. Ask your salesperson about where you can purchase these additional items.
- Step 5 - Start the software.
Windows Login Screen:
1. User ID Xray
2. Password admin
Launch the Patient Image by double-clicking the ICON Just click on the login (there is no password). You can add users and passwords in the systems settings on the software after log-in.
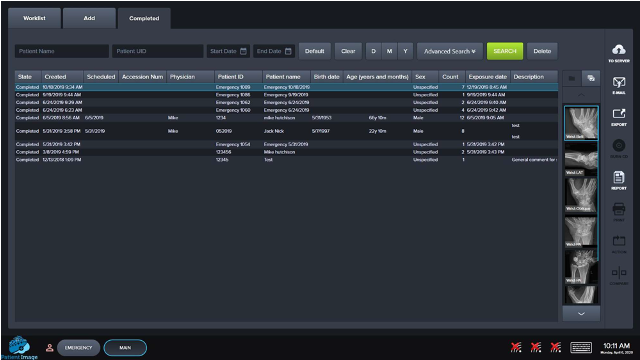
Make sure the DR panel is connected to the computer From the worklist screen, you will see the status of the DR panel in the pictures below.
When you click on Emergency or New Study the panel will turn You will see the FDX 70009 signal at the bottom. (ready state) Select the body part, position the patient and press the trigger button
DR panel Software Training Video
Here is a software training video that will review how to take an x-ray.
Do’s and Don’ts:
- Do not hit or drop the equipment:
- The product may be damaged if it receives a strong Using a damaged detector without repair may result in fire or electric shock.
- Do not spill liquid or chemicals onto the especially in the case that the patient is injured, which requires the equipment to come in contact with blood or body fluids, protect the equipment with a disposable cover as necessary.
- Turn OFF the power to each piece of equipment for safety when not being used.
- Handle the equipment carefully
- Do not submerge the DR panel in water
- Be sure to use the detector on a flat surface to ensure that the detector is not Otherwise, the internal image sensor may be damaged. Be sure to securely hold the detector while using it in an upright position. Otherwise, the detector may fall over, resulting in personal injury, or may flip over, resulting in damage to the inner components of the DR panel.
- DO NOT PLACE EXCESSIVE WEIGHT ON THE DETECTOR.
- Otherwise, the internal image sensor may be damaged. Weight-bearing protective covers for the DR panel are available for purchase if needed. Please contact your sales representative at Maven Imaging for pricing.
- When cleaning the DR panel detector, be sure to turn OFF the power and unplug the power cord from the side panel. Do not use alcohol, benzene, thinner, or and any other flammable cleaning agents

